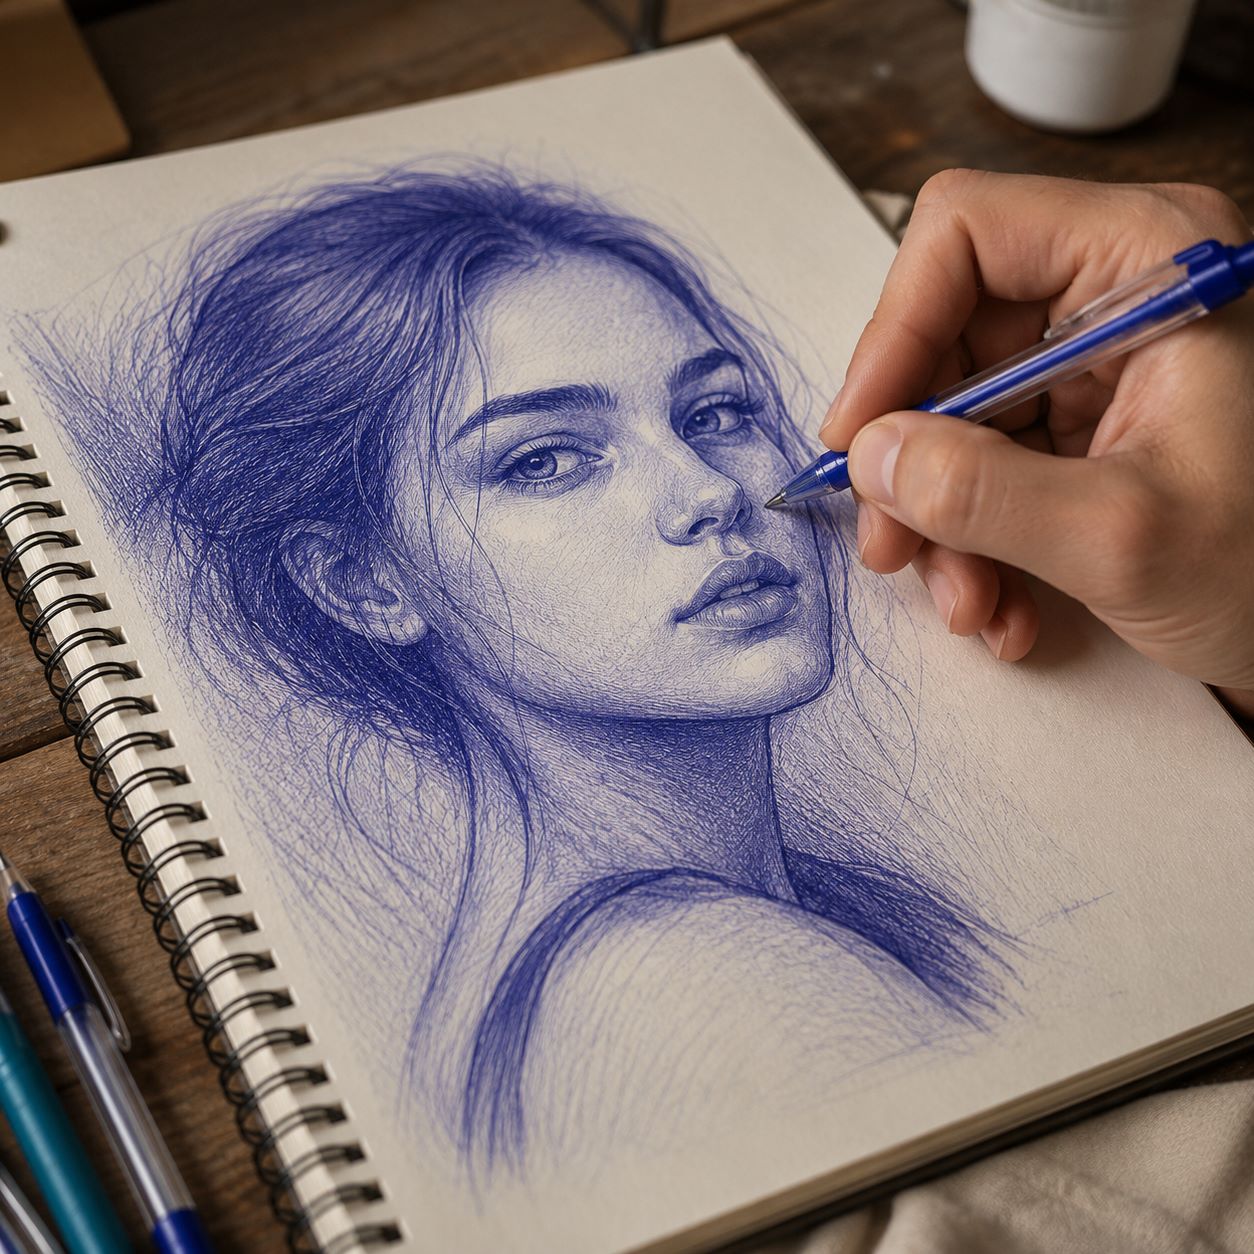
How to Shade With a Ballpoint Pen: Techniques, Blending Tips, and Beginner Mistakes to Avoid
Shading with a ballpoint pen looks simple until you actually try it. A pencil can be erased, smudged, and softened easily. A ballpoint pen is more permanent. Every line stays on the paper, every dark mark is harder to correct, and too much pressure can quickly create harsh shadows or ink blobs.
But that is also what makes ballpoint pen shading so interesting. With the right technique, a regular ballpoint pen can create smooth gradients, deep shadows, realistic textures, and surprisingly detailed drawings. The key is not pressing harder. The key is learning how to control pressure, build layers slowly, and use different shading methods intentionally.
Can you shade with a ballpoint pen?
Yes, you can absolutely shade with a ballpoint pen. In fact, many artists use ballpoint pens for portraits, sketches, still-life drawings, and highly detailed illustrations.
Ballpoint pens work well for shading because they allow you to build tone gradually. A light touch creates pale gray or light blue marks, depending on the ink color. Repeated layers create darker values. By controlling how close the lines are, how much pressure you use, and how many layers you add, you can create a wide range of shadows.
The main challenge is that ballpoint ink is not as forgiving as pencil. If you press too hard too early, the area may become too dark before you are ready. If your strokes are uneven, the shading can look scratchy. If the pen releases too much ink, you may get small blobs.
So the first rule is simple:
Shade lightly first, then build darker tones gradually.
How ballpoint pen shading works
Ballpoint pen shading is mostly about layering. Unlike graphite, ballpoint ink does not blend by smearing easily. You usually create smooth shading by placing many light marks close together until the tone looks even.
Think of it as building shadows in thin transparent layers.
A light first layer creates the base tone. A second layer deepens the shadow. A third layer can push the area darker. If you change stroke direction slightly between layers, you can create a smoother, richer value.
Good ballpoint shading depends on three things:
- pressure control
- stroke direction
- patience
If your hand pressure changes too much, the shading becomes patchy. If your strokes go in random directions, the texture becomes messy. If you rush, you will probably press too hard and lose the smooth transition.
What are the 4 methods of shading?
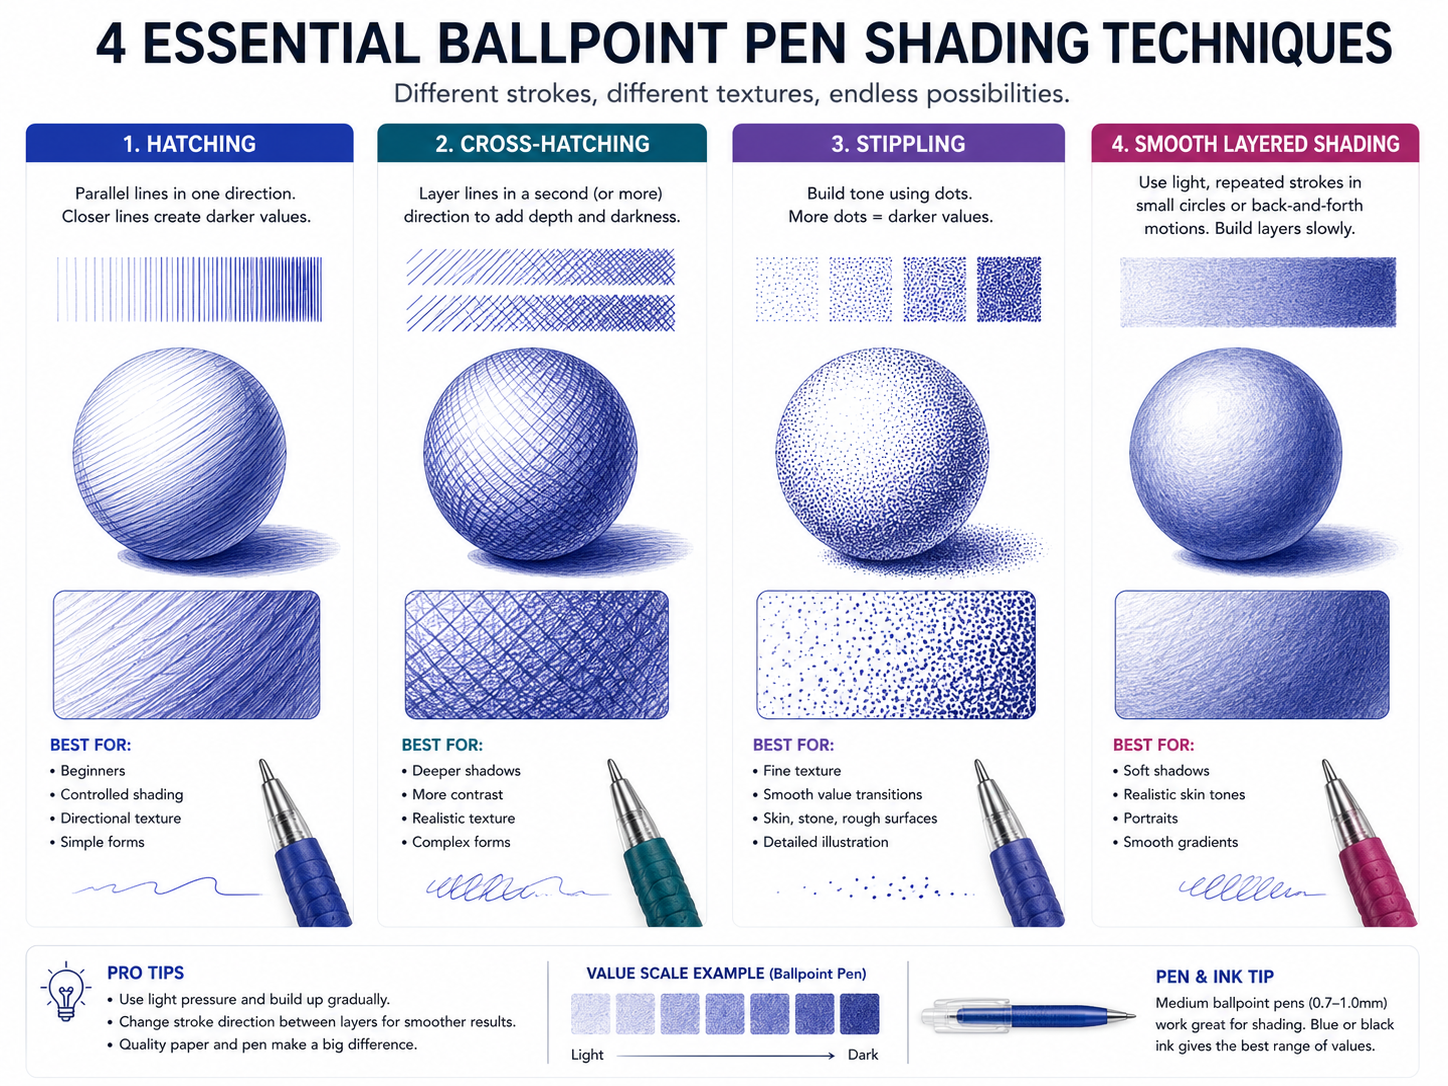
The four main shading methods often used with a ballpoint pen are hatching, cross-hatching, stippling, and smooth layered shading. Each one creates a different texture and visual effect.
1. Hatching
Hatching is one of the simplest and most useful pen shading methods. It uses parallel lines to create value.
The closer the lines are, the darker the area looks. The farther apart the lines are, the lighter the area looks.
Hatching is good for:
- beginners
- controlled shadows
- simple forms
- directional texture
- quick sketches
For example, if you are drawing a cylinder, you can use curved hatching lines that follow the shape of the object. This makes the shading feel more three-dimensional.
To improve hatching, keep your lines consistent. Do not rush. Try to make each stroke move in the same general direction. If the lines are uneven, the shading may look messy instead of intentional.
2. Cross-hatching
Cross-hatching is hatching with extra layers of lines crossing over the first layer. You can add lines at different angles to create darker values and more depth.
Cross-hatching is useful when you need:
- stronger shadows
- richer contrast
- realistic texture
- darker areas without pressing too hard
The best way to use cross-hatching is to layer slowly. Start with one light direction of lines. Then add a second direction. If the area still needs to be darker, add a third layer.
The mistake beginners often make is crossing lines too randomly. Cross-hatching should still feel controlled. The line direction should support the form of the object, not fight against it.
3. Stippling
Stippling uses dots instead of lines. More dots create darker shading. Fewer dots create lighter shading.
This method is excellent for controlled texture, but it takes time. It is not the fastest way to shade, but it can create beautiful results when done carefully.
Stippling is good for:
- skin texture
- stone texture
- rough surfaces
- detailed illustration
- soft value transitions
With a ballpoint pen, stippling requires a gentle touch. Avoid stabbing the paper too hard. Use small, controlled dots and build density slowly. If you press too strongly, the dots can become too dark or uneven.
4. Smooth layered shading
Smooth layered shading is the method most people want when they ask how to blend with a ballpoint pen. Instead of using obvious lines or dots, you build soft shadows with very light repeated strokes.
This can be done with:
- tiny circular strokes
- very light back-and-forth strokes
- overlapping curved strokes
- soft directional layering
The goal is to make the marks blend visually, even though the ink itself is not being physically blended like pencil.
Smooth layered shading is useful for:
- portraits
- skin tones
- soft shadows
- realistic objects
- gradual gradients
The secret is to keep the pressure extremely light at first. If you need darker values, add more layers instead of pressing harder.
How to blend with a ballpoint pen
Blending with a ballpoint pen is different from blending with pencil. You cannot rely on smudging. Instead, you create the illusion of blending through gradual layering.
Start with your lightest value. Use very soft pressure and make small, even strokes. Then slowly add another layer over the area that needs to be darker. Keep the transition zone light and gentle. Do not create a sharp line between light and shadow unless the object actually has a hard edge.
To make ballpoint shading look smoother:
- use light pressure
- overlap strokes slightly
- build tone slowly
- avoid sudden dark marks
- keep your hand movement consistent
- clean ink buildup from the pen tip when needed
If you want a gradient from light to dark, begin with almost no pressure. Then gradually add more layers toward the shadow side. The transition should be built with layers, not force.
How to get better at shading with a pen
The fastest way to improve is not to draw complicated subjects immediately. It is to practice basic value control.
Start with simple exercises.
Draw a row of small boxes and shade each one slightly darker than the last. This trains your hand to create value steps.
Then practice gradients. Try to shade from very light to very dark in one long rectangle. Your goal is a smooth transition without sudden jumps.
After that, practice basic forms:
- sphere
- cube
- cylinder
- cone
These forms teach you how light and shadow work. Once you understand simple forms, shading real objects becomes much easier.
Also study your light source. Before shading anything, ask:
- Where is the light coming from?
- Where is the darkest shadow?
- Where is the reflected light?
- Where is the cast shadow?
Better shading is not only about pen technique. It is also about understanding light.
Common mistakes when shading with a ballpoint pen
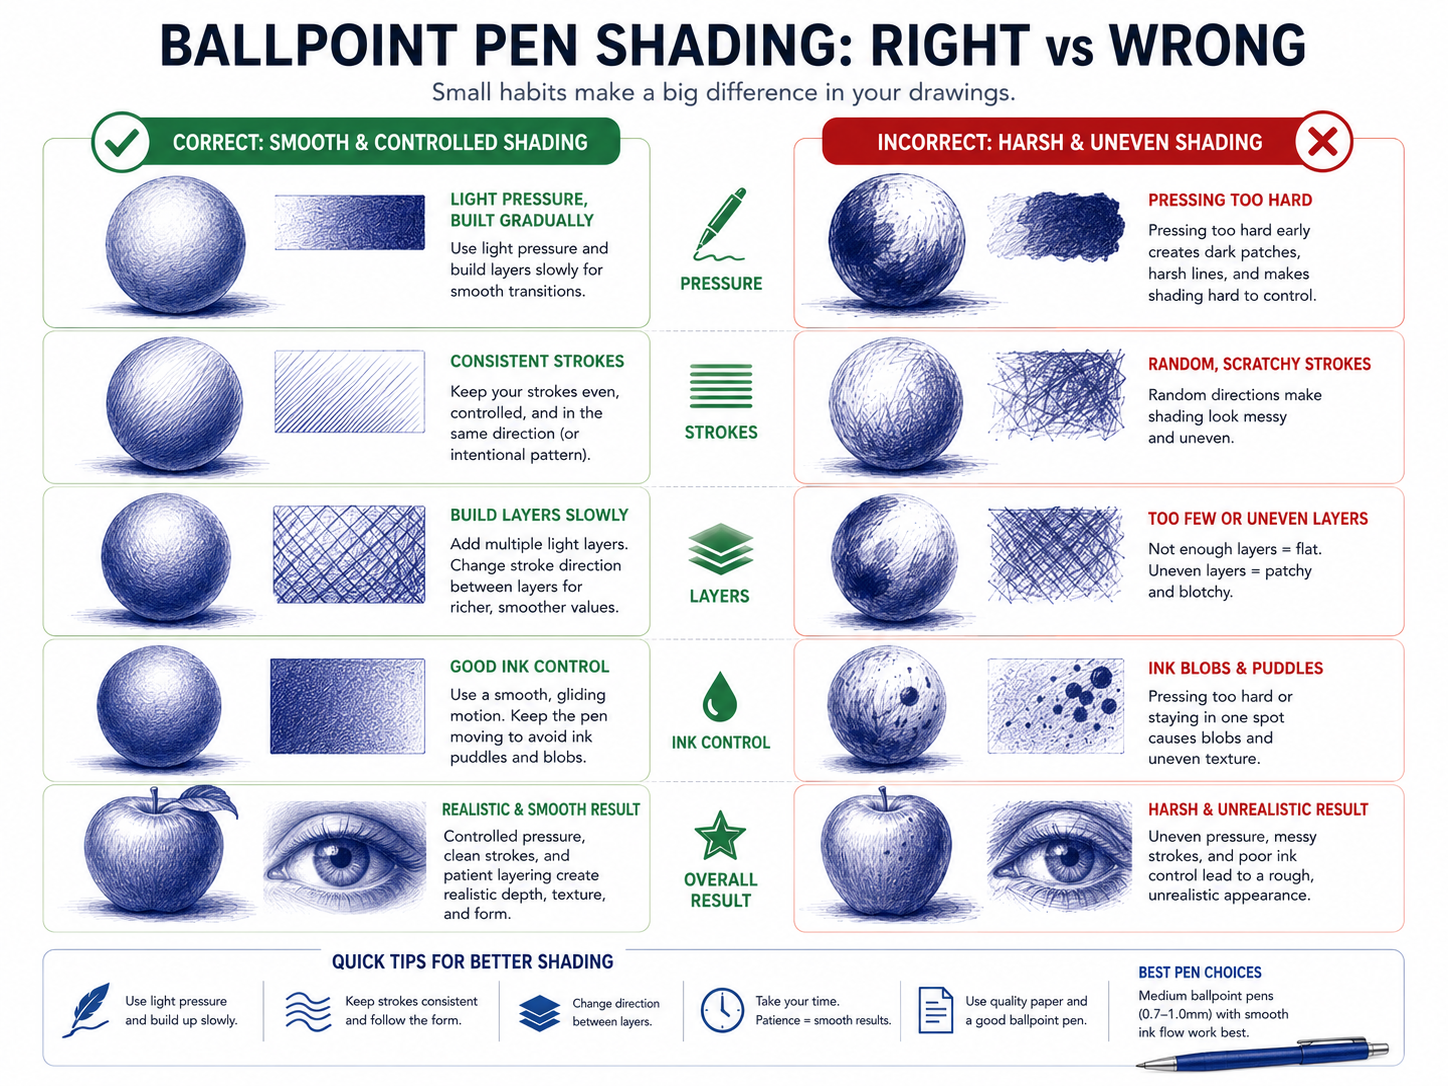
Pressing too hard too soon
This is the most common mistake. Heavy pressure creates dark marks that are difficult to soften later. Start lighter than you think you need.
Trying to blend like pencil
Ballpoint ink does not behave like graphite. You usually cannot smudge it into a smooth tone. Use layering instead.
Using random strokes
Random strokes can make shading look messy. Choose a stroke direction that follows the form of the object.
Ignoring the light source
If the light direction is unclear, the shading will look confusing no matter how smooth your technique is.
Not cleaning the pen tip
Ballpoint pens sometimes collect ink at the tip. If that ink suddenly transfers to the paper, it can create blobs. Wipe the tip gently on scrap paper when needed.
Using poor paper
Very rough or thin paper can make pen shading harder. Smooth paper usually gives more even results.
Best ballpoint pen for shading
You do not need an expensive pen to start shading. A reliable everyday ballpoint pen can work well if the ink flow is consistent.
A fine-tip pen is good for:
- details
- controlled lines
- small drawings
A medium-tip pen is good for:
- smoother coverage
- larger shaded areas
- softer gradients
The best pen is one that does not skip too much, does not release large ink blobs, and feels comfortable in your hand.
Simple practice exercise for beginners
Try this exercise:
- Draw a simple circle.
- Decide where the light is coming from.
- Leave the lightest area mostly white.
- Use very light hatching to shade the opposite side.
- Add cross-hatching to the darkest shadow.
- Use light layered strokes to soften the transition.
- Add a cast shadow under the sphere.
This one exercise teaches pressure control, value, light direction, and layering.
Do it several times with different light directions. You will improve quickly.
Why ballpoint pen shading can look so realistic
Ballpoint pen shading can look realistic because it forces you to build values slowly. Since you cannot erase easily, you learn to observe more carefully. You also learn to control line weight, spacing, direction, and pressure.
This medium rewards patience. The more carefully you layer, the more realistic the result becomes.
Many beginners think smooth shading comes from one perfect stroke. It does not. Smooth ballpoint shading usually comes from dozens of small, controlled decisions.
Final answer
Yes, you can shade with a ballpoint pen. The best way to do it is to use light pressure, build shadows gradually, and practice the four main shading methods: hatching, cross-hatching, stippling, and smooth layered shading.
To blend with a ballpoint pen, do not try to smear the ink like pencil. Instead, create smooth transitions with repeated light layers. If you want to get better, practice value scales, gradients, and simple forms before moving on to complex drawings.
The real secret to ballpoint pen shading is simple:
Do not press harder. Layer smarter.
FAQ
Can you blend ballpoint pen like pencil?
Not really. Ballpoint ink does not smudge like graphite. Blending is usually created through light layering and gradual transitions.
What paper works best for ballpoint pen shading?
Smooth, medium-weight paper usually works best because it allows consistent ink flow without too much rough texture.
Is cross-hatching better than smooth shading?
Neither is better overall. Cross-hatching is great for texture and contrast, while smooth shading is better for soft gradients and realistic forms.
Why does my ballpoint shading look scratchy?
It may be caused by too much pressure, uneven strokes, rough paper, or inconsistent pen flow.
How do artists get smooth gradients with pen?
They use very light pressure, repeated layers, controlled stroke direction, and gradual value transitions.
What is the easiest shading method for beginners?
Hatching is usually the easiest method to start with because it is structured and easier to control.